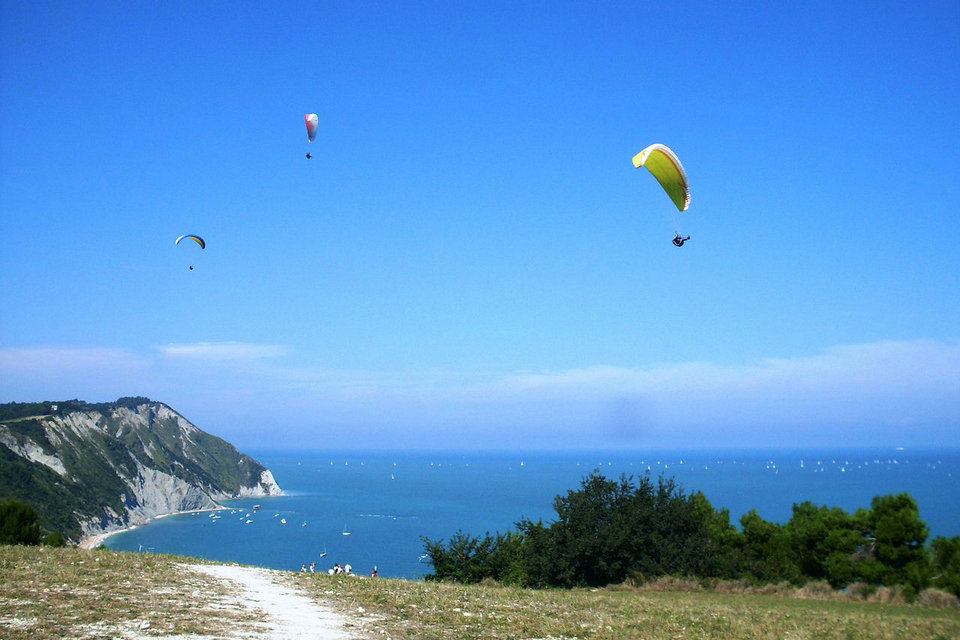
Paragliding is the recreational and competitive adventure sport of flying paragliders: lightweight, free-flying, foot-launched glider aircraft with no rigid primary structure. The pilot sits in a harness suspended below a fabric wing. Wing shape is maintained by the suspension lines, the pressure of air entering vents in the front of the wing, and the aerodynamic forces of the air flowing over the outside.
Despite not using an engine, paraglider flights can last many hours and cover many hundreds of kilometers, though flights of one to two hours and covering some tens of kilometers are more the norm. By skillful exploitation of sources of lift, the pilot may gain height, often climbing to altitudes of a few thousand meters.
Equipment
Wing
The paraglider wing or canopy is usually what is known in engineering as a “ram-air airfoil”. Such wings comprise two layers of fabric that are connected to internal supporting material in such a way as to form a row of cells. By leaving most of the cells open only at the leading edge, incoming air keeps the wing inflated, thus maintaining its shape. When inflated, the wing’s cross-section has the typical teardrop aerofoil shape. Modern paraglider wings are made of high-performance non-porous materials such as ripstop polyester or nylon fabric.
In some modern paragliders (from the 1990s onwards), especially higher-performance wings, some of the cells of the leading edge are closed to form a cleaner aerodynamic profile. Holes in the internal ribs allow a free flow of air from the open cells to these closed cells to inflate them, and also to the wingtips, which are also closed.
The pilot is supported underneath the wing by a network of suspension lines. These start with two sets of risers made of short (40 cm) lengths of strong webbing. Each set is attached to the harness by a carabiner, one on each side of the pilot, and each riser of a set is generally attached to lines from only one row of its side of wing. At the end of each riser of the set, there is a small delta maillon with a number (2-5) of lines attached, forming a fan. These are typically 4–5 metres long, with the end attached to 2−4 further lines of around 2 m, which are again joined to a group of smaller, thinner lines. In some cases this is repeated for a fourth cascade.
The top of each line is attached to small fabric loops sewn into the structure of the wing, which are generally arranged in rows running span-wise (i.e., side to side). The row of lines nearest the front are known as the A lines, the next row back the B lines, and so on. A typical wing will have A, B, C and D lines, but recently, there has been a tendency to reduce the rows of lines to three, or even two (and experimentally to one), to reduce drag.
Paraglider lines are usually made from Dyneema/Spectra or Kevlar/Aramid. Although they look rather slender, these materials are immensely strong. For example, a single 0.66 mm-diameter line (about the thinnest used) can have a breaking strength of 56 kg.
Paraglider wings typically have an area of 20–35 square metres (220–380 sq ft) with a span of 8–12 metres (26–39 ft) and weigh 3–7 kilograms (6.6–15.4 lb). Combined weight of wing, harness, reserve, instruments, helmet, etc. is around 12–22 kilograms (26–49 lb).
The glide ratio of paragliders ranges from 9.3 for recreational wings to about 11.3 for modern competition models, reaching in some cases up to 13. For comparison, a typical skydiving parachute will achieve about 3:1 glide. A hang glider ranges from 9.5 for recreational wings to about 16.5 for modern competition models. An idling (gliding) Cessna 152 light aircraft will achieve 9:1. Some sailplanes can achieve a glide ratio of up to 72:1.
The speed range of paragliders is typically 20–75 kilometres per hour (12–47 mph), from stall speed to maximum speed. Beginner wings will be in the lower part of this range, high-performance wings in the upper part of the range.
For storage and carrying, the wing is usually folded into a stuffsack (bag), which can then be stowed in a large backpack along with the harness. For pilots who may not want the added weight or fuss of a backpack, some modern harnesses include the ability to turn the harness inside out such that it becomes a backpack.
Paragliders are unique among human-carrying aircraft in being easily portable. The complete equipment packs into a rucksack and can be carried easily on the pilot’s back, in a car, or on public transport. In comparison with other air sports, this substantially simplifies travel to a suitable takeoff spot, the selection of a landing place and return travel.
Tandem paragliders, designed to carry the pilot and one passenger, are larger but otherwise similar. They usually fly faster with higher trim speeds, are more resistant to collapse, and have a slightly higher sink rate compared to solo paragliders.
Harness
The pilot is loosely and comfortably buckled into a harness, which offers support in both the standing and sitting positions. Most harnesses have foam or airbag protectors underneath the seat and behind the back to reduce the impact on failed launches or landings. Modern harnesses are designed to be as comfortable as a lounge chair in the sitting or reclining position. Many harnesses even have an adjustable “lumbar support”. A reserve parachute is also typically connected to a paragliding harness.
Harnesses also vary according to the need of the pilot, and thereby come in a range of designs, mostly: Training harness for beginners, Pax harness for tandem passengers that often also doubles as a training harness, XC Harness for long distance cross country flights, All round harness for basic to intermediate pilots, Pod harness, which is for intermediate to pro pilots that focus on XC. Acro harnesses are special designs for acrobatic pilots, Kids tandem harnesses are also now available with special child-proof locks.
Instruments
Most pilots use variometers, radios, and, increasingly, GPS units when flying.
Technical aids
Many paraglider pilots use a variometer (short: Vario) as a technical aid to be able to determine their own climb and descent values as well as the altitude. Especially in cross-country flight, many also use a GPS device for position determination and flight recording. In the meantime, combination devices have been established on the market that combine both functions.
Some pilots also carry a radio. This is mostly for private communication. Aeronautical radio is not required in this type of aviation and is rarely used in cross-country flying to obtain an air traffic control clearance if necessary.
Clothing
For clothing, warm, windproof textiles, such as Gore-Tex, are used, as it becomes colder with increasing altitude (between 0.65 ° C and 1 ° C per 100 vertical meters). Shoes with a high shaft for ankle protection and a mandatory helmet are just as much a part of the equipment as a pair of gloves to protect your fingers, if you need to grip them directly into the lines.
Helmets do not have to meet certain specifications. Accordingly, both a special flying helmet that has been certified according to DIN EN 966 (and specially developed for paragliding or hang gliding) and a bicycle helmet can be used legally. In Switzerland, the helmet is only mandatory during exams and training.
Variometer
The main purpose of a variometer is in helping a pilot find and stay in the “core” of a thermal to maximise height gain and, conversely, to indicate when a pilot is in sinking air and needs to find rising air. Humans can sense the acceleration when they first hit a thermal, but cannot detect the difference between constant rising air and constant sinking air. Modern variometers are capable of detecting rates of climb or sink of 1 cm per second. A variometer indicates climb rate (or sink-rate) with short audio signals (beeps, which increase in pitch and tempo during ascent, and a droning sound, which gets deeper as the rate of descent increases) and/or a visual display. It also shows altitude: either above takeoff, above sea level, or (at higher altitudes) flight level.
Radio
Radio communications are used in training, to communicate with other pilots, and to report where and when they intend to land. These radios normally operate on a range of frequencies in different countries—some authorised, some illegal but tolerated locally. Some local authorities (e.g., flight clubs) offer periodic automated weather updates on these frequencies. In rare cases, pilots use radios to talk to airport control towers or air traffic controllers. Many pilots carry a cell phone so they can call for pickup should they land away from their intended point of destination.
GPS
GPS (global positioning system) is a necessary accessory when flying competitions, where it has to be demonstrated that way-points have been correctly passed. The recorded GPS track of a flight can be used to analyze flying technique or can be shared with other pilots. GPS is also used to determine drift due to the prevailing wind when flying at altitude, providing position information to allow restricted airspace to be avoided and identifying one’s location for retrieval teams after landing out in unfamiliar territory. GPS is integrated with some models of variometer. This is not only more convenient, but also allows for a three-dimensional record of the flight. The flight track can be used as proof for record claims, replacing the “old” method of photo documentation.
Flying
Launching
As with all aircraft, launching and landing are done into wind. The wing is placed into an airstream, either by running or being pulled, or an existing wind. The wing moves up over the pilot into a position in which it can carry the passenger. The pilot is then lifted from the ground and, after a safety period, can sit down into his harness. Unlike skydivers, paragliders, like hang gliders, do not “jump” at any time during this process. There are two launching techniques used on higher ground and one assisted launch technique used in flatland areas:
Forward launch
In low winds, the wing is inflated with a forward launch, where the pilot runs forward with the wing behind so that the air pressure generated by the forward movement inflates the wing.
It is often easier, because the pilot only has to run forward, but the pilot cannot see his wing until it is above him, where he has to check it in a very short time for correct inflation and untangled lines before the launch.
Reverse launch
In higher winds, a reverse launch is used, with the pilot facing the wing to bring it up into a flying position, then turning around under the wing and running to complete the launch.
Reverse launches have a number of advantages over a forward launch. It is more straightforward to inspect the wing and check if the lines are free as it leaves the ground. In the presence of wind, the pilot can be tugged toward the wing, and facing the wing makes it easier to resist this force and safer in case the pilot slips (as opposed to being dragged backwards). However, the movement pattern is more complex than forward launch, and the pilot has to hold the brakes in a correct way and turn to the correct side so he does not tangle the lines. These launches are normally attempted with a reasonable wind speed, making the ground speed required to pressurise the wing much lower.
The launch is initiated by the hands raising the leading edge with the A’s. As it rises the wing is controlled more by centering the feet than by use of the brakes or C’s. With mid level wings (EN C and D) the wing may try to “overshoot” the pilot as it nears the top. This is checked with C’s or brakes. The wing becomes increasingly sensitive to the C’s and brakes as its internal air pressure rises. This is usually felt from increasing lift of the wing applying harness pressure to the “seat of the pants”. That pressure indicates that the wing is likely to remain stable when the pilot pirouettes to face the wind.
The next step in the launch is to bring the wing into the lift zone. There are two techniques for accomplishing, this depending on wind conditions. In light wind this is usually done after turning to the front, steering with the feet towards the low wing tip, and applying light brakes in a natural sense to keep the wing horizontal. In stronger wind conditions it is often found to be easier to remain facing downwind while moving slowly and steadily backwards into the wind.
Knees bent to load the wing, foot adjustments to remain central and minimum use of C’s or Brakes to keep the wing horizontal. Pirouette when the feet are close to lifting. This option has two distinct advantages. a) The pilot can see the wing centre marker (an aid to centering the feet) and, if necessary, b) the pilot can move briskly towards the wing to assist with an emergency deflation.
With either method it is essential to check “traffic” across the launch face before committing to flight.
Towed launch
In flatter countryside, pilots can also be launched with a tow. Once at full height (towing can launch pilots up to 3000 feet altitude), the pilot pulls a release cord, and the towline falls away. This requires separate training, as flying on a winch has quite different characteristics from free flying. There are two major ways to tow: pay-in and pay-out towing. Pay-in towing involves a stationary winch that winds in the towline and thereby pulls the pilot in the air. The distance between winch and pilot at the start is around 500 meters or more. Pay-out towing involves a moving object, like a car or a boat, that pays out line slower than the speed of the object, thereby pulling the pilot up in the air. In both cases, it is very important to have a gauge indicating line tension to avoid pulling the pilot out of the air. Another form of towing is “static line” towing. This involves a moving object, like a car or a boat, attached to a paraglider or hang glider with a fixed-length line. This can be very dangerous, because now the forces on the line have to be controlled by the moving object itself, which is almost impossible to do, unless stretchy rope and a pressure/tension meter (dynamometer) is used. Static line towing with stretchy rope and a load cell as a tension meter has been used in Poland, Ukraine, Russia, and other Eastern European countries for over twenty years (under the name Malinka) with about the same safety record as other forms of towing. One more form of towing is hand towing. This is where 1−3 people pull a paraglider using a tow rope of up to 500 feet. The stronger the wind, the fewer people are needed for a successful hand tow. Tows up to 300 feet have been accomplished, allowing the pilot to get into a lift band of a nearby ridge or row of buildings and ridge-soar in the lift the same way as with a regular foot launch.
Speed up
Through a foot-operated cable system, the accelerator or speed system, which is usually connected by means of Brummelhaken with the risers, or with the hands operated trimmers, the pilot can influence the angle of attack of the paraglider. By pressing this device, the “cap nose” is pulled down. The smaller angle of attack to the incoming air caused by the falling air resistance in addition to the increased forward speed, a greater sinking and increased dynamics of the screen in air turbulence. The danger of Einklappern increases here.
When flying with ears folded, the angle of attack increases due to the higher air resistance of the cap, which can then be compensated by operating the speed system. In this maneuver, the speed system has a stabilizing effect.
The accelerator is used to move faster, eg. B. to be able to leave areas with falling air masses (falling winds) quickly to be driven off in strong headwinds not to the rear or to be able to fly over valley crossings faster. Furthermore, the increased forward speed helps to search an area faster after winding up.
Turning up, cranking up
Since the pilot and the paraglider are heavier than the surrounding air, the paraglider can only slide down to the ground in calm air. Only with paragliders with drive (paramotor) an active height gain is possible. As with gliders, however, these aircraft can gain altitude by utilizing lift. Both thermal and dynamic windings are used.
Thermal windings are caused by temperature differences of the air masses. In the pilot language, these are referred to as bubbles (individual air packets), hose or beard – these are quasistationarily ascending air masses. Upwelling under clouds is of particular importance for cross-country flying. They are created by the condensation of rising moist air and can in turn suck in other air masses. With corresponding wind conditions, real cloud roads are created, which can be run off.
The use of dynamic updrafts is called ” soaring “. Here, the wind currents are exploited for gaining altitude, which are directed by obstacles such as mountain flanks or cliffs upwards.
The pilot can fly from one updraft area to the next. In addition to the density, intensity and height of the updraft areas, the wind speed, the gliding performance of the aircraft and the usable time of day are decisive for the possible flight distance. With appropriate application and combination of techniques, the pilot can stay in the air for hours. It can also cover larger distances (see records).
Thermal updrafts can be used aviatorically up to the cloud base, the base. According to German air right may in uncontrolled and controlled airspace to flight level FL100 (equivalent to 10,000 ft. Or 3.048 m above the standard atmosphere of 1013.2 hPa) without clearance by the air traffic control are flown. In high mountains like the Alps, this limit is higher at FL130 (about 3,962 m), to allow an overflight of the mountains below the air spaces to be released. In the SwissAlps are allowed on weekends, sometimes up to 4,600 m ascend. For airspace C (“Charlie”) above FL100 or FL130 a release of the air traffic control is necessary, which is usually not granted for paragliders due to the lack of transponders and aeronautical radios.
Flight maneuvers and flight conditions with the paraglider
With a paraglider can perform various maneuvers. They are taught as part of basic training or in courses, helping pilots to master their attitude in almost any situation, and also to be prepared for turbulent conditions in thermal flying.
This includes mastering the various flight conditions such as best glide, lowest sinking, minimum speed, accelerated flight. Likewise, the main malfunctions should be able to be fixed such as side rattle, front flapper, stall. Controlling the descent aids is also important: Accelerated flying (with associated increased sinking), create ears, steep spiral, B-stable.
Advanced maneuvers in the field of paragliding acrobatics are offered. However, in Germany aerobatics with air sports equipment is prohibited.
Landing
Landing a paraglider, as with all unpowered aircraft which cannot abort a landing, involves some specific techniques and traffic patterns. Paragliding pilots most commonly lose their height by flying a figure of 8 in over landing zone until the correct height is achieved, then line up into the wind and give the glider full speed. Once the correct height (about a meter above ground) is achieved the pilot will ‘stall’ the glider in order to land.
Traffic pattern
Unlike during launch, where coordination between multiple pilots is straightforward, landing involves more planning, because more than one pilot might have to land at the same time. Therefore, a specific traffic pattern has been established. Pilots line up into a position above the airfield and to the side of the landing area, which is dependent on the wind direction, where they can lose height (if necessary) by flying circles. From this position, they follow the legs of a flightpath in a rectangular pattern to the landing zone: downwind leg, base leg, and final approach. This allows for synchronization between multiple pilots and reduces the risk of collisions, because a pilot can anticipate what other pilots around him are going to do next.
Techniques
Landing involves lining up for an approach into wind and, just before touching down, “flaring” the wing to minimise vertical and/or horizontal speed. This consists of gently going from 0% brake at around two meters to 100% brake when touching down on the ground.
In light winds, some minor running is common. In moderate to medium headwinds, the landings can be without forward speed, or even going backwards with respect to the ground in strong winds, but this would usually mean that the conditions were too strong for that glider.
Additionally, at around four meters before touching ground, some momentary braking (50% for around two seconds) can be applied then released, thus using forward pendular momentum to gain speed for flaring more effectively and approaching the ground with minimal vertical speed.
For strong winds during landing, two techniques are common: the first, “flapping” the wing to make it lose performance and thus descend faster by alternatively braking and releasing around once per second (though the danger of inducing a stall during this manoeuvre makes it an “experts only” technique), and the second, collapsing the wing immediately after touchdown to avoid being dragged, by either braking at maximum or quickly turning around and pulling down the D-risers (the last set of risers from the leading edge).
Control
Brakes: Controls held in each of the pilot’s hands connect to the trailing edge of the left and right sides of the wing. These controls are called “brakes” and provide the primary and most general means of control in a paraglider. The brakes are used to adjust speed, to steer (in addition to weight shift), and to flare (during landing).
Weight Shift: In addition to manipulating the brakes, a paraglider pilot must also lean in order to steer properly. Such weight shifting can also be used for more limited steering when brake use is unavailable, such as when under “big ears” (see below). More advanced control techniques may also involve weight shifting.
Speed Bar: A kind of foot control called the “speed bar” (also “accelerator”) attaches to the paragliding harness and connects to the leading edge of the paraglider wing, usually through a system of at least two pulleys (see animation in margin). This control is used to increase speed and does so by decreasing the wing’s angle of attack. This control is necessary because the brakes can only slow the wing from what is called “trim speed” (no brakes applied). The accelerator is needed to go faster than this.
More advanced means of control can be obtained by manipulating the paraglider’s risers or lines directly. Most commonly, the lines connecting to the outermost points of the wing’s leading edge can be used to induce the wingtips to fold under. The technique, known as “big ears”, is used to increase rate of descent (see picture and the full description below). The risers connecting to the rear of the wing can also be manipulated for steering if the brakes have been severed or are otherwise unavailable. For ground-handling purposes, a direct manipulation of these lines can be more effective and offer more control than the brakes. The effect of sudden wind blasts can be countered by directly pulling on the risers and making the wing unflyable, thereby avoiding falls or unintentional takeoffs.
Fast descents
Problems with “getting down” can occur when the lift situation is very good or when the weather changes unexpectedly. There are three possibilities of rapidly reducing altitude in such situations, each of which has benefits and issues to be aware of. The “big ears” maneuver induces descent rates of 2.5 to 3.5 m/s, 4–6 m/s with additional speed bar. It is the most controllable of the techniques and the easiest for beginners to learn. The B-line stall induces descent rates of 6–10 m/s. It increases loading on parts of the wing (the pilot’s weight is mostly on the B-lines, instead of spread across all the lines). Finally, a spiral dive offers the fastest rate of descent, at 7–25 m/s. It places greater loads on the wing than other techniques do and requires the highest level of skill from the pilot to execute safely.
Big ears
Pulling on the outer A-lines during non-accelerated, normal flight folds the wing tips inwards, which substantially reduces the glide angle with only a small decrease in forward speed. As the effective wing area is reduced, the wing loading is increased, and it becomes more stable. However, the angle of attack is increased, and the craft is closer to stall speed, but this can be ameliorated by applying the speed bar, which also increases the descent rate. When the lines are released, the wing re-inflates. If necessary, a short pumping on the brakes helps reentering normal flight. Compared to the other techniques, with big ears, the wing still glides forward, which enables the pilot to leave an area of danger. Even landing this way is possible, e.g., if the pilot has to counter an updraft on a slope.
B-line stall
In a B-line stall, the second set of risers from the leading-edge/front (the B-lines) are pulled down independently of the other risers, with the specific lines used to initiate a stall. This puts a spanwise crease in the wing, thereby separating the airflow from the upper surface of the wing. It dramatically reduces the lift produced by the canopy and thus induces a higher rate of descent. This can be a strenuous maneuver, because these B-lines have to be held in this position, and the tension of the wing puts an upwards force on these lines. The release of these lines has to be handled carefully not to provoke a too fast forward shooting of the wing, which the pilot then could fall into. This is less popular now as it induces high loads on the internal structure of the wing.
Spiral dive
The spiral dive is the most rapid form of controlled fast descent; an aggressive spiral dive can achieve a sink rate of 25 m/s. This maneuver halts forward progress and brings the flier almost straight down. The pilot pulls the brakes on one side and shifts his weight onto that side to induce a sharp turn. The flight path then begins to resembles a corkscrew. After a specific downward speed is reached, the wing points directly to the ground. When the pilot reaches his desired height, he ends this maneuver by slowly releasing the inner brake, shifting his weight to the outer side and braking on this side. The release of the inner brake has to be handled carefully to end the spiral dive gently in a few turns. If done too fast, the wing translates the turning into a dangerous upward and pendular motion.
Spiral dives put a strong G-force on the wing and glider and must be done carefully and skilfully. The G-forces involved can induce blackouts, and the rotation can produce disorientation. Some high-end gliders have what is called a “stable spiral problem”. After inducing a spiral and without further pilot input, some wings do not automatically return to normal flight and stay inside their spiral. Serious injury and fatal accidents did occur when pilots could not exit this maneuver and spiraled into the ground.
The rate of rotation in a spiral dive can be reduced by using a drogue chute, deployed just before the spiral is induced. This reduces the G forces experienced.
Soaring
Soaring flight is achieved by utilizing wind directed upwards by a fixed object such as a dune or ridge. In slope soaring, pilots fly along the length of a slope feature in the landscape, relying on the lift provided by the air, which is forced up as it passes over the slope. Slope soaring is highly dependent on a steady wind within a defined range (the suitable range depends on the performance of the wing and the skill of the pilot). Too little wind, and insufficient lift is available to stay airborne (pilots end up scratching along the slope). With more wind, gliders can fly well above and forward of the slope, but too much wind, and there is a risk of being blown back over the slope. A particular form of ridge soaring is “condo soaring”, where pilots soar a row of buildings that form an artificial “ridge”. This form of soaring is particularly used in flat lands where there are no natural ridges, but there are plenty of man-made, building “ridges”.
Thermal flying
When the sun warms the ground, it will warm some features more than others (such as rock faces or large buildings), and these set off thermals which rise through the air. Sometimes these may be a simple rising column of air; more often, they are blown sideways in the wind and will break off from the source, with a new thermal forming later.
Once a pilot finds a thermal, he begins to fly in a circle, trying to center the circle on the strongest part of the thermal (the “core”), where the air is rising the fastest. Most pilots use a vario-altimeter (“vario”), which indicates climb rate with beeps and/or a visual display, to help core in on a thermal.
Often there is strong sink surrounding thermals, and there is also strong turbulence resulting in wing collapses as a pilot tries to enter a strong thermal. Good thermal flying is a skill that takes time to learn, but a good pilot can often core a thermal all the way to cloud base.
Cross-country flying
Once the skills of using thermals to gain altitude have been mastered, pilots can glide from one thermal to the next to go cross country. Having gained altitude in a thermal, a pilot glides down to the next available thermal.
Potential thermals can be identified by land features that typically generate thermals or by cumulus clouds, which mark the top of a rising column of warm, humid air as it reaches the dew point and condenses to form a cloud.
Cross-country pilots also need an intimate familiarity with air law, flying regulations, aviation maps indicating restricted airspace, etc.
Safety
Paragliding, like any extreme sport, is a potentially dangerous activity. In the United States, for example, in 2010 (the last year for which details are available), one paraglider pilot died. This is an equivalent rate of two in 10,000 pilots. Over the years 1994−2010, an average of seven in every 10,000 active paraglider pilots have been fatally injured, though with a marked improvement in recent years. In France (with over 25,000 registered fliers), two of every 10,000 pilots were fatally injured in 2011 (a rate that is not atypical of the years 2007−2011), although around six of every 1,000 pilots were seriously injured (more than two-day hospital stay).
The potential for injury can be significantly reduced by training and risk management. The use of proper equipment such as a wing designed for the pilot’s size and skill level, as well as a helmet, a reserve parachute, and a cushioned harness also minimize risk. Pilot safety is influenced by an understanding of the site conditions such as air turbulence (rotors), strong thermals, gusty wind, and ground obstacles such as power lines. Sufficient pilot training in wing control and emergency manoeuvres from competent instructors can minimize accidents. Many paragliding accidents are the result of a combination of pilot error and poor flying conditions.
Source from Wikipedia